Young artists always inspire me! I discovered wildlife artist, Taylor Nichezynski, on Facebook. I was impressed with her drawing skills and asked if she would share her helpful Grid Method tips to help my readers.
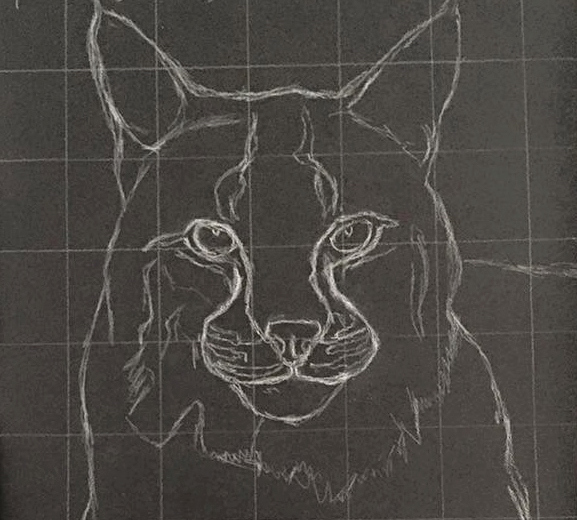
Before we get started, here is a bit about The Grid Method:
Since ancient Egyptian times, artists have been using The Grid Method as a drawing tool to improve accuracy. The Egyptians used this method by ‘snapping’ a string soaked in red dye against their drawing surface to create their grid lines.
The Renaissance artists used The Grid Method a bit differently in their works. Using a wooden frame, they would hammer in nails spaced equally apart and tie lengths of string from one end to the other to create their rows and columns. The the frame would be placed in front of the model or painting subject so they could look through the grid.
Throughout history many famous artists have used the Grid Method for drawing including M.C. Escher, Leonardo Da Vinci, Albrecht Durer, Van Gogh. Since the invention of the camera, the Grid Method has evolved to where artists print out a photo and draw their grid directly onto the photo or overlay it with transparent film.
I hope you enjoy Taylor’s following tips!
Charcoal Drawing Using The Grid Method
First, choose a very large, clearly detailed reference photo. I store all of my reference photos on my computer. I will be working from a photo sized to fit on an 8×10 inch piece of paper. If you can print a larger image, I encourage you to do so. The bigger the reference photo the better. (Note: Make sure you own the rights to the image if you are planning to sell or publish your finished drawing).
Before ever putting an outline of the subject down, I grid out my subject. This method is a common one used among many artists. First thing you are going to want to do is have a very large, clear, detailed reference photo. I store all of my reference photos on my computer. Next, I print the reference photo onto an 8×10 inch piece of paper. If you can print a larger image, I encourage you to do so. The bigger the reference photo the better.
Once I have my photo printed, I use the grid method and mark the photo in 1×1 squares using a plain ruler.
Materials Needed:
White Charcoal (Generals pencil and block)
Black Charcoal (Generals pencil and block; 3B and 4B)
Strathmore Black Artagain Paper Pad 9ins x 12ins – 60lb
Electric Eraser
Putty Eraser
Drafting Brush
Blending Stumps
Tape Measure
Ruler
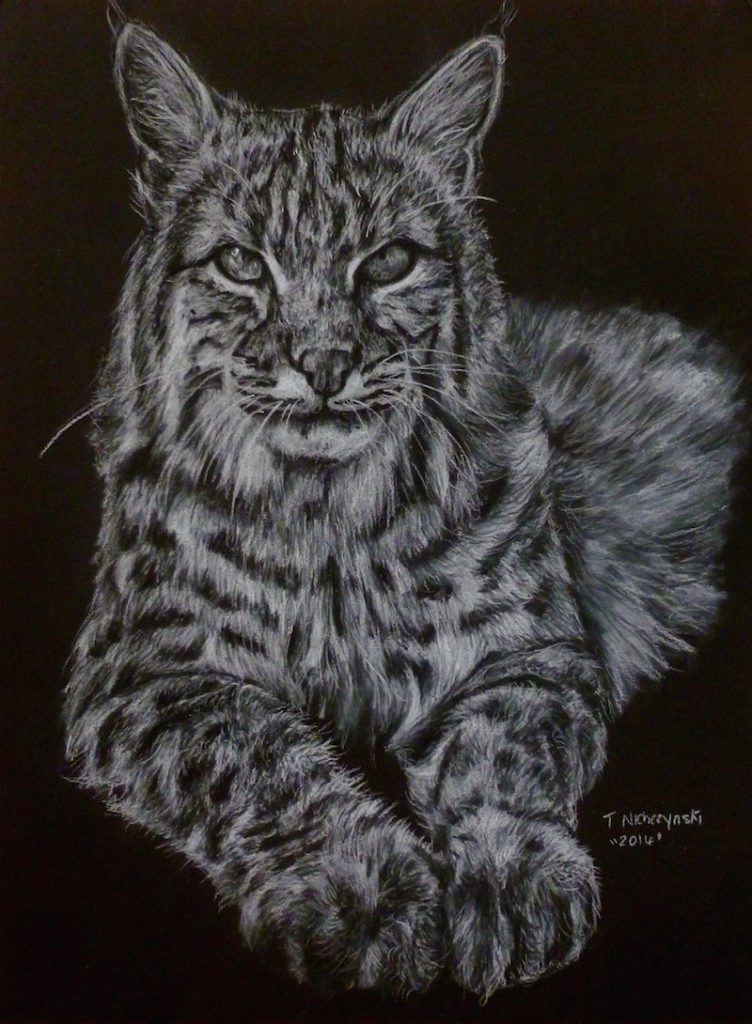
High quality image; graphed (Image is a resident from Safe Haven Wildlife Sanctuary, with whom I am a partner.)

Next, I determine how large my actual piece will be. Now, here comes the math skills. Don’t worry, it is simple easy math! All you will be doing is determine what size to make your squares on your piece to match the number of squares on your reference image.
Example: Reference size is 8×10 with 1 inch squares, your piece’s size is 12×14 with 1.5 inch squares. If you are using Photoshop, making a grid of your photo will be simple.
Once your outline is in take your white charcoal pencil and go square by square to fill in your outline. Using The Grid Method will not only help you make a more accurate drawing but it forces you to slow down. The outline is where most of us want to rush through. We want to get to the juicy part of filling in the piece. Keep in mind, without an accurate drawing, the finished piece will be inaccurate too.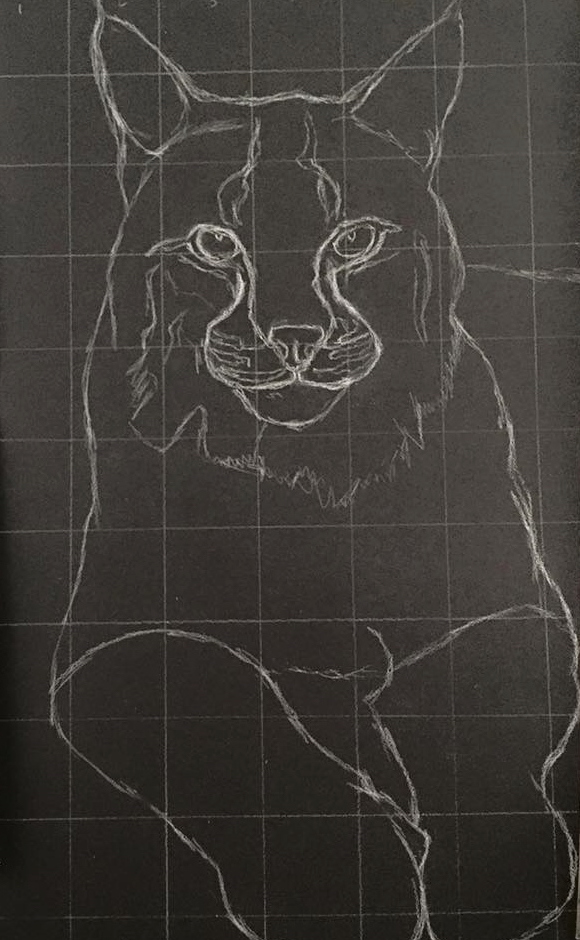
I typically start with the face. Establishing the eyes in as much detail as possible grounds me in with the drawing. The viewer will always want to look at the eyes, they really are the gateway to the soul. You can package such a message into just the eyes alone, starting here is a perfect way to set the tone for the piece.
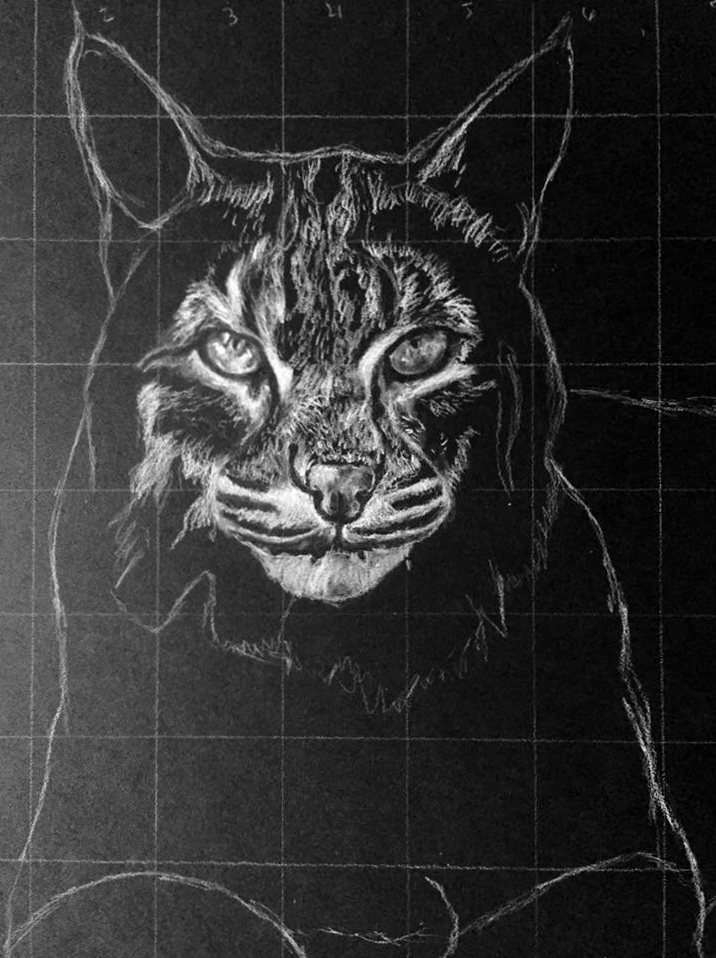
When you’re satisfied with your outline, lightly erase the grid lines and start to fill in the piece.
Doing a white charcoal piece is a bit of a trick on the brain. Think of drawing from a old negative. Lightly start the fill in process with a light hand. Using the white charcoal, I stroke in the fur in the direction that it grows.
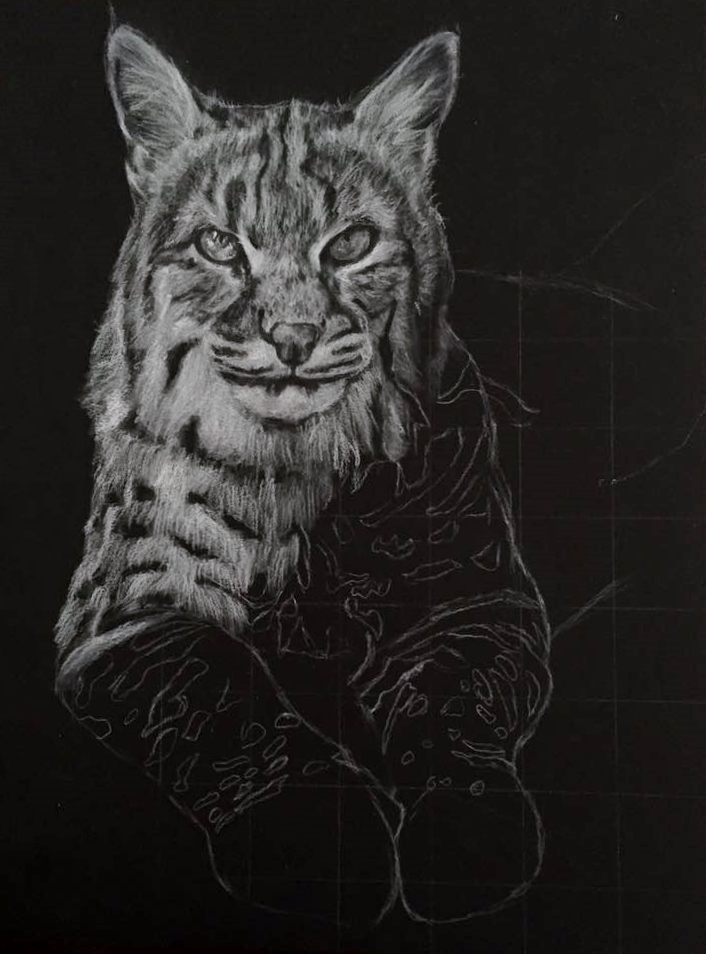
Continue doing this this for the entire piece. Throughout this process softly blend the fur strokes together using a light hand, as always. Layering is key when it comes to building volume for fur. Next bring is some strokes of the black charcoal pencil (3B or 4B). This will create a great affect for thickness, especially around the neck area.
Keep doing this process until you are satisfied. Save the small details, like the long whiskers, for last using a sharp point of your white charcoal. If you find a mistake, using your putty eraser to lightly pull it out.
Here’s my finished charcoal drawing using The Grid Method!
Guest artist/blogger: After being enrolled in an art class at the age of eight, Taylor Nichezynski was able to face her childhood difficulties through creation. Mostly self-taught, Taylor combines her passion for wildlife and the environment. Taylor hopes to spread the word of conservation through bright vibrant colors on paper or canvas. Visit Taylor’s website www.taylorannfineart.squarespace.com and check out her interesting Facebook page. https://www.facebook.com/TaylorAnnCreations
To learn more about The Grid Method read this.


wow…its amazing.. m truly inspired..