Flower painting, and the ability to capture the fleeting beauty of a floral arrangement has been popular since the 1500s.
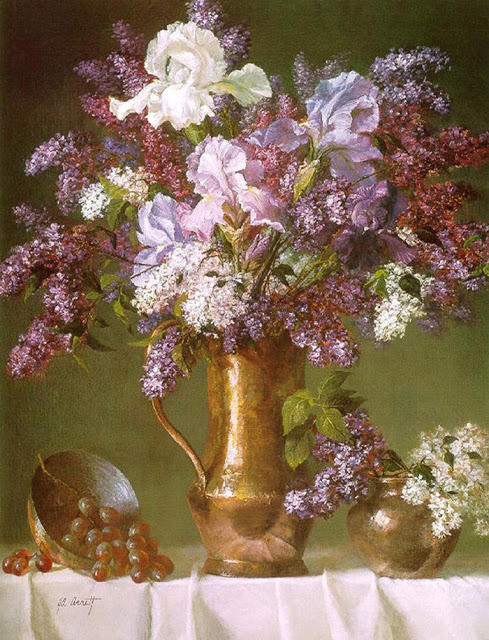
During the 1600-1700s, the Dutch, Flemish, Italian, German and French artists further innovated the floral still-life. By the 1800s, the French impressionists favored painting vibrant landscapes, but they also enjoyed exploring the artistic potential of flower painting.
Still today, many art genres ranging from realism to impressionism, and beyond, challenge themselves with flower painting. One of the most notable floral painters of today is, Joe Anna Arnett. Like the Impressionists before her, Joe Anna is equally comfortable painting the landscape in plein air, or a still-life in her garden or studio.

Years ago, I first met Joe Anna in Scottsdale at one of her popular still life painting workshops. I learned some valuable oil painting techniques that I still use today. Since then, Joe Anna has remained a wonderful mentor and friend.
In fact, Joe Anna generously shared even more painting secrets in my popular book, Fine Art Tips with Lori McNee: Painting Techniques and Professional Advice.
Meanwhile, it is my honor to share Joe Anna’s demo here with you!
How To Create An Impressionist Flower Painting by Joe Anna Arnett
“Nothing is truly yours until you give it away.” ~Joe Anna Arnett
This floral composition is an idea about gesture and was a fabrication. I observed the iris and the lilacs from life, but they were never in the same place. There was never an actual set-up for this flower painting.

The Block-in
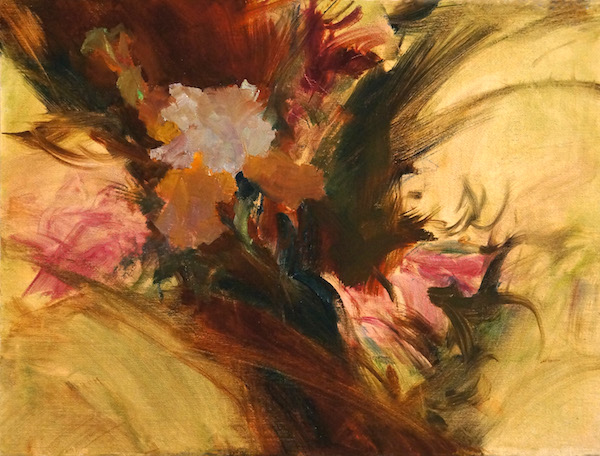
Begin on a canvas toned with a mixture of Ultramarine Blue Deep, Transparent Oxide Red and a touch of Yellow Ochre. Brush this on and then wipe it down with a paper towel. Allow this to dry.
Next, very loosely indicate the location of the iris and the lilacs and put in the abstraction of the background. With a #12 flat brush, I used Transparent Oxide Red and a touch of Ultramarine blue deep thinking more about a dramatic gesture than anything that really existed.
Create the Focal Point
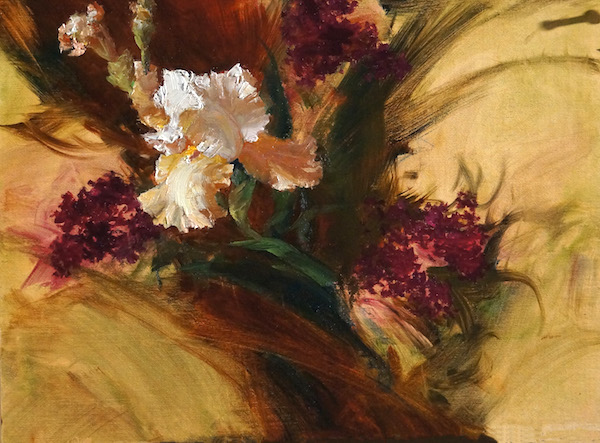
The bi-color iris is the center of interest of the painting, so start there. Begin with the iris flower in its shadow color and value first, thinking only about its shape. For the shadow of the White Standard (the petals that stand up), use ultramarine blue deep, a touch of cadmium red orange, plus white. For the Falls (the petals that fall down), use cadmium red orange plus a touch of permanent rose, and a tiny amount of manganese blue to dull the mixture. Manganese is a very green blue and acted as a compliment to keep the orange from becoming too saturated.
Painting the Lights
Finish the iris, by painting the lights in thick impasto. For the Standards, use white with a bit of green added. I made the green with manganese blue and cadmium yellow pale. I added just a touch, though to take it away from straight white. For the Falls, mix white plus cadmium red orange, permanent rose, and a breath of cadmium yellow pale. For the tiny halftones, I picked up a little bit of the green I mixed for the Standards.
Use bold strokes. Put the paint down and leave it. If it isn’t right, do it again. If you put it on tentatively and then go back into it, you will lose that fresh immediate feeling.
Put the lilac shapes in using only their shadow color which was alizarin crimson plus ultramarine blue deep. These were Charles Jolly lilacs and they are a deep wine red.
Finishing Touches
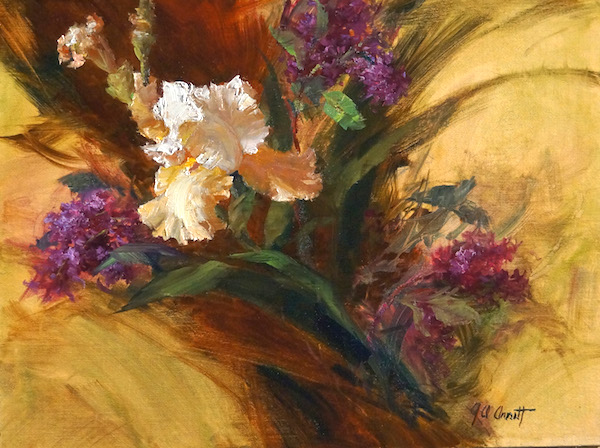
Work wet into wet for the entire painting. In the final steps, paint the lights on the lilacs using ultramarine blue deep, and permanent rose plus white. Do not render the lilacs fully. They are of secondary interest and should not to compete with the iris. Once the lights are painted, use a soft brush to blur the lilacs just a bit.
I developed the spent blossom and the bud and added a few leaves to the lilacs as well as some of the broad sweeping leaves of the iris. Keep these strokes very simple and gestural.
Throughout the flower painting, I was careful not to finish too much and worked at creating an idea about movement rather than a literal rendering.
“I paint my flowers in only two stages. The beginning and the end.” ~Joe Anna Arnett
- Stacking petal on top of petal works as long as you use thick paint and a light touch. I try to do each petal in a single stroke.
- The more painting you do on a flower, the less fresh it will look. Try to put the strokes down and leave them. If you miss the shape, scrape it and do it again. That is one of the great secrets to painting fresh flowers.
- Stacking petal on top of petal works as long as you use thick paint and a light touch. I try to do each petal in a single stroke. This gives power and authority to the petal.
“If you have a good idea for a painting, write it down immediately. It could drift away and you might miss a masterpiece.” ~ Joe Anna Arnett
Joe Anna shares even more of her secrets in my book, Fine Art Tips!



I just want to say: Beautiful! Thanks for sharing this articles with us.
Thank you for enjoying it!