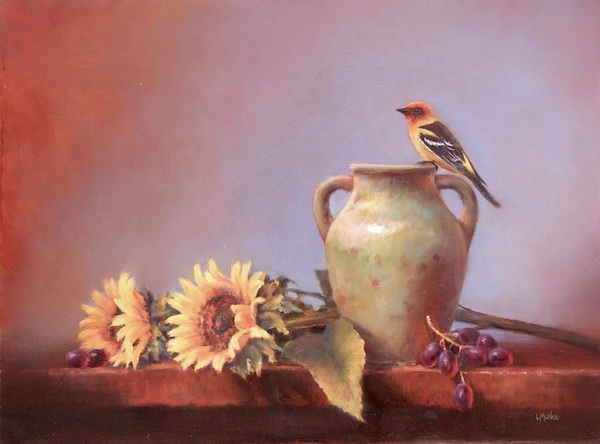
Alright I’ll admit it. This painting is actually, “off my easel” now and hanging in my current gallery exhibition at Kneeland Gallery . However, I did complete it recently and thought you all might like to see the progression and thought process behind this painting.
The Concept:
I live in a winter wonderland and love it, but I must confess to having moments where I find myself longing for and reminiscing about the warmer days of summer. This painting, “Western Summer”, depicts just that. I chose to paint the quintessential sunflower, who’s cheery blossoms reminds of us warmer days. The colorful Western Tanager songbird’s coloring echo that of the sunflowers. (You might enjoy this great instructional book on painting birds & animals).
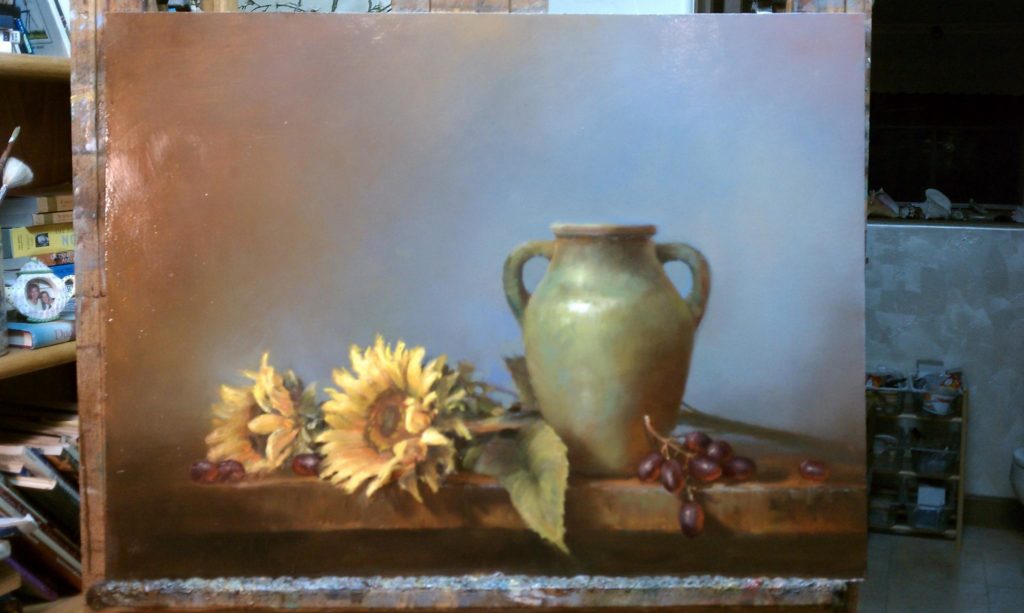
The rustic green pot was selected to bring a country feel to the painting. But more importantly, the green cooled off the concept and kept the painting from getting too hot. The grapes added a bit of interest and the purples naturally complimented the sunny yellows.
The Start:
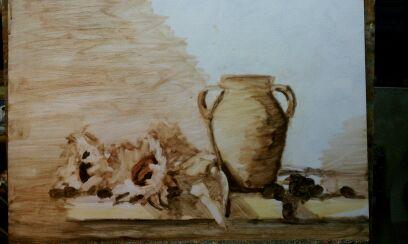
My still life painting technique lends itself to painting on hardboard. Most often, I start with a gessoed hardboard panel sometimes called, Masonite. Like the majority of my paintings, I began this project by mixing raw umber and burnt sienna together and then thinned the mixture into a watercolor consistency. The warm under-painting makes for a complimentary ground for the cooler greens to build upon…
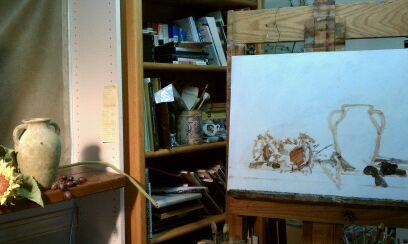
*Notice the still life set-up is to the left of my painting.
- This is a little trick I learned back in a college typing class.
- When learning how to type, the teacher trained us to put the document we were copying to the left of ourselves.
- Also, it is easier on the eyes and brain to have the light source coming from the left, rather than the right.
- This is why I set up my studio to have choose to have my still life props on my left!
Next, I began to block in the basic shapes. I immediately, anchor the painting with some dark shapes and plan my light areas. I like my light source coming from the left. This helps to comfortably move the viewer’s eye through the painting from the left to the right, just like we read in Western cultures.
Once again, I got so engrossed in painting the sunflowers that I forgot to photograph the various stages of their progress. But luckily, the video below shows a great demo of me painting sunflowers! Meanwhile, I think you might learn a bit about the ‘method to the madness’ behind a still life painting…
The Middle:
Next, I decided to keep the warm under-painting of the background on the left-hand side and cooled it off as it progressed to the right. A cool lavender color is a beautiful compliment for the warm yellows of the flowers. The grapes are highlighted with this same cool color to bring a congruent feeling to the painting.
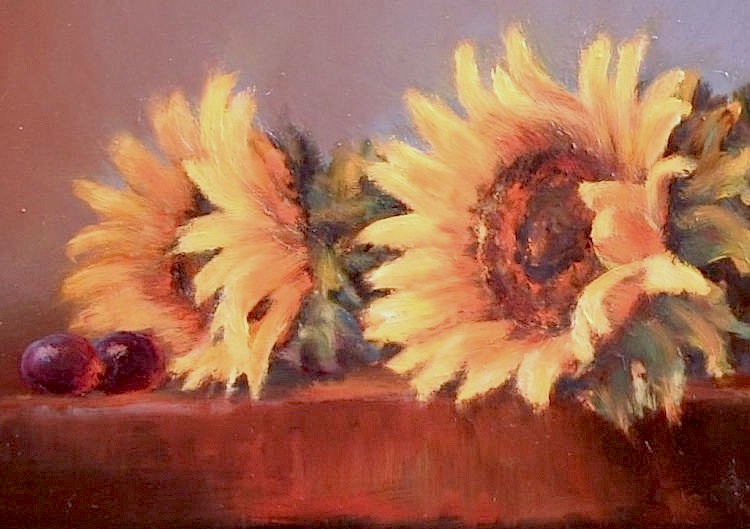
Here is a detail of the finished sunflowers.
The Finish:
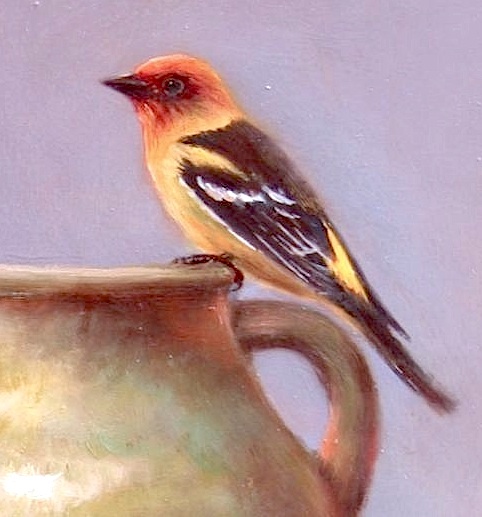
As most of you know by now, I like to add a bit of ‘life’ to my still life paintings. The old masters added dead birds, birds’ nests, butterflies, etc…so, why can’t I add a living bird? My birds are the cherry on top of the painting and I treat them as such. Because of this, I generally wait until I know the whole painting is working before I take the time to add the bird. As you can see above, the painting is almost complete. The bird is added last and then I again work the background to envelope the bird in its surrounding. You can watch How to Paint a Blue Jay to see how I paint my birds, or consider this book, Keys to Painting Fur & Feathers.
Voila! The finished painting, “Western Summer”!
*I hope you enjoyed this little demo and learned a thing or two! Let me know if you have any questions. ~Lori … PS. Let’s meet on Facebook and Twitter!
You might like these other informative posts:
When Are You Ready to Call Yourself a Professional Artist?
On My Easel #3: From Lemons to Lemonade
On My Easel #2: The Challenge of Painting the Illusion of Blown Glass
On My Easel: Still Life Oil Painting Demo #1
Save Money. Learn How to Gesso a Hardboard Panel for Painting
Bringing the Still Life to Life: A Painting Demo by Master, Jeff Legg
The New Still Life Paintings of Lori McNee
Top Paint Brush Tips from the Art Pros on Facebook
Plum TV Presents: A Winter Gallery Walk in Sun Valley, Idaho
How I Destroyed a Painting to Make it Better
14 Art Business Tips from the Top Pros on Twitter


beautiful! And the bird makes it perfect 🙂
Thank you for the short and sweet comment! I really appreciate it, Anna.
Cheers-
Lori
Buenos dias Lori,
Saludos desde Colombia, desafortunadamente no hablo ingles pero necesitaba escribirte para expresarte lo que siento y quizá alguien te pueda traducir.
Su trabajo es maravilloso, muchas gracias por compartirlo con nosotros. Yo te vi por you tube y quede impresionada con su bellísimo trabajo.
Estoy segura de eres fuente de inspiración para muchas personas y seria feliz si alguien como usted me enseñara su técnica. Se que es algo difícil pero no imposible y por ahora afortunadamente tu nos das tus videos y los seguiré y pondré en práctica.
Tengo poco tiempo en la pintura pero se que es algo verdaderamente alucinante y siguiere intentando mejorar cada día y lograr hacer cuadros tan lindos como los tuyos.
Me encanta los fondos que usas, dan profundidad y sentido a la obra.
Ojala algún día nos enseñe como lograr hacer fondos como los suyos.
Nuevamente muchas gracias!!
Con todo el cariño,
Mónica
Hola Monica, y gracias por tomarse el tiempo para compartir sus pensamientos amables conmigo. Me alegro de que te gusten mis videos. Ellos son divertidos de hacer. Voy a hacer más que mostrar el “cómo” de la pintura.
Yo soy un artista que trabaja y gestionar algunos blogs, así que estoy muy ocupado en estos días. Los videos son divertidos de hacer, pero tienen algo de tiempo extra.
Espero que siga mi blog, llamado http://finearttips.com, Bellas Artes Consejos paraclases de pintura extra. Usted puede encontrar mucha información interesante parausted ayudar.
Muchas gracias por el correo electrónico de buena.
Gracias-Lori 🙂