“On My Easel,” is an new series of random demo posts that will showcase my own my paintings in progress from the easel to completion.
When admiring or viewing artwork, do you ever wonder ‘how’ it was created? The creative process which can be a mystery for art fans and artists alike.
Funnily enough, because I share so many art business and blogging tips, some of my readers are surprised that I actually paint…and yes, art is my daytime job! Anyway, I thought I had better start sharing a bit more of my own artwork…so you can see me ‘walk the talk’.
This is perfect timing, for I am feverishly painting for my upcoming still life art exhibit at Kneeland Gallery this February 2011 and will have quite a few pieces to share with you. I want to mention that I took these images with my Smart Phone camera, will I was working. So I apologize in advance that the photo quality isn’t better – but they are good enough for a demo.
I thought it might be fun for you to see what’s on my easel as I share a bit of my own works-in-progress, as well as my thought process during the creation of a painting. There really is a method-to-the-madness, I hope these forthcoming posts will help you understand…
*****
The Concept:
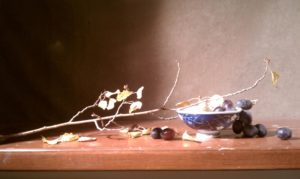
I began this painting before Thanksgiving, so to commemorate that time of year I wanted an autumn feeling to this piece. Most of the aspen leaves had blown off the trees, but luckily I found a few for this set up. I liked the dynamic look of the branch across the cup. I knew I would place my bird subject on the vertical, twig to the right of center.
I chose to use the blue & white Asian cup and decided upon a horizontal board. The grapes anchored the painting and balanced the dark shadow on the left. The composition clearly reads from left to right – Western cultures are accustomed to this, so it feels naturally pleasing.
The Start:
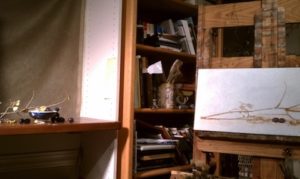
I quickly sketched the composition while keeping in mind, the rule of thirds. Sometimes I block-in more boldly, but this time I drew the set up then started laying in the darks. Next, I paint in the under-painting using burnt sienna, raw umber and some ultramarine blue. I forgot to take a picture of that stage, but promise to do so in the future!
The Middle:
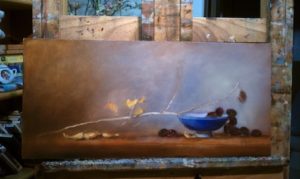
I wanted color concept in this painting to be about blue and yellow. I carefully used the color to move the viewer’s eye throughout the composition.
Generally, I like to block in the whole painting in to about two-thirds of completion before I add my birds or other wildlife to my compositions. However, I do plan ahead and know where the bird will be placed within the painting for the purpose of the composition.
The Finish:
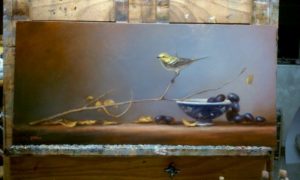
As you can see, the bird is perched on the bare branch as planned. The yellow warbler is in the -sweet spot- of the painting. He is looking left, into the painting. If he was looking to the right, the viewer’s eye would move off the painting too quickly.
I lightened the single, dead leaf to the far right of the branch because it was too distracting. The tumbling grapes add the the action. The curved little twig to the left of the bird causes an important tension which keeps the painting from being ‘too peaceful’ and it helps whip your eye back into the painting.
Upon finishing the piece, I was at a loss for a painting title! So, I asked my Facebook Fan Page friends for their help. Kendra Smith came up with the great title, “Autumn Medley”.
©2010 Lori McNee
Autumn Medley
12×24
oil/board
$2800
I hope you enjoyed this post. Please share your questions or comments. For more information about this painting or other works of mine, please visit my art website: LoriMcNee.com
Thanks for visiting! ~Lori
*****
How I Destroyed a Painting to Make it Better
3 Steps to Set Up & Light a Still Life Painting
Still Life Painting: Create Your Own Small Universe


Great demo Lori and I love how the painting turned out. It is fun and mysterious to watch other artists compose their paintings. Sometimes you feel like there is no way in the world they are going to be able to make something from the marks they are making only for them to make a grand painting.
It’s fun to see you here, my Twitter friend. Thanks for enjoying the demo and letting me know.
Hope to see you again soon-
Lori
Lovely Painting Lori, and a great demo..but most of all I loved the way you explained each tiny aspect of the painting…It just shows that you knew exactly what you were doing…..It was truly educational..I should try to do that with my works too…
Thank you Once again…
Hello Sandhya-
Wonderful seeing you here again. Thanks for the good feedback and I am happy you are learning a thing or two from me. It is always fun to see how others create.
Best-
Lori
Great explanation, Lori, very clear and interesting. Love the finished product, too! Beautiful painting. Thanks for your very informative website.
Wonderful post. It is helpful to understand your thought process and see the different stages of your beautiful works. Good luck with your exhibition!
Really good…. U r a best Artist…. I wish u to draw to more paintings……..
Hello Yasiru-
Thank you for the nice comment about my paintings. I do paint a lot. You can see more of my paintings at http://LoriMcNee.com
Nice meeting you here.
Lori