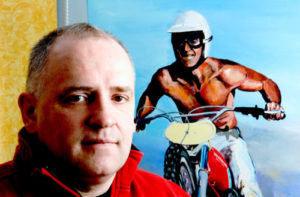
by guest artist/author: Rob Kinsey
Often I am asked, “Where do you get your inspiration from?” or “How long does it take you to paint a picture?” So, I thought for my next work I’d give you an “over the shoulder” look at what goes into one of my paintings. This isn’t intended to be a step by step instructional, I’ll leave that up to the TV artists! It’s about how I work, the different stages of a painting, composition, drawing, scaling up, under-painting etc to a final finished piece.
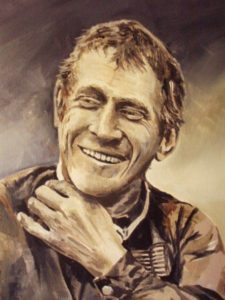
I have decided to paint a portrait of the iconic actor, Steve McQueen. He has a face that has “walked a thousand miles” just oozing with character and expression. I have found some refreshing photographs by Lynn Wineland, who perhaps captured the “real McQueen”- relaxed with friends and enjoying his great love of motorcycling.
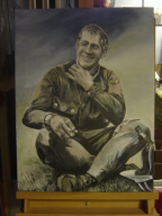
I have chosen the photograph of Steve sitting cross legged, relaxed and smiling with the obligatory cigarette in hand. So, I’ve got the reference photo to work with and I’m inspired to paint!
The Set Up to Paint:
- Before I get painting, I’d talk a little about the equipment I use and my set-up in my studio.
- Studio may be too grand a word for it!, a converted bedroom after one of my children went to university.
- It get plenty of natural light and great views over the fields to the peak District beyond.
- Along one wall are mirrored wardrobe doors, a great feature to look at your work in reverse and check on the draughtmenship.
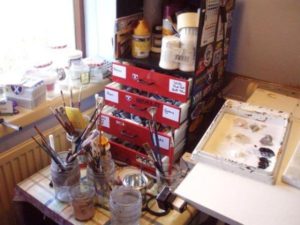
- This is my work station, a collection of drawers crammed full with every acrylic colour imaginable.
- I have arranged them into seperate drawers by colour coding to easily reach a colour.
- I use jam jars full of brushes and pallette knives.
- I must admit to having a bit of a “fetish” for brushes and paints.
- Everytime I go to my local art shop, Reams in Derby, I always end up buying new brushes and colours.
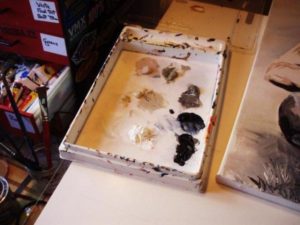
- I use a “wet palette”, a great tool for working with fast drying acryllic.
- Underneath the colours is a blotting type paper covered with a thin tracing type paper.
- This holds water and keeps the colours workable for up to a week, providing you replace the coverering lid every time.
Getting Started:
- Once I have selected the right image, the composition is the important part, what to draw and more importantly what to leave out of the frame!
- I draw a square grid over the photograph then scale it up to a bigger grid on the canvas.
- This helps keep everything in proportion.
- Once I’m happy with the drawing, tip Look at it in a mirror and this will magnify any errors that need correcting.
The Underpainting/Drawing:
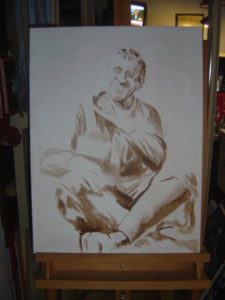
- I have decided to paint this portrait as a monochrome piece, using shades of warm and cool grey to replicate the original photo but also in keeping with the historical date of the event back in 1964.
- Working with monochrome, your drawing and painting skills have to be A+ as you cant “blind” a viewer with juxtaposed pretty looking colours!
- Using dilluted raw Umber acrylic paint, I put a thin wash across the whole canvas.
- This gets rid of the stark white canvas which tends to glare through thin layers of paint.
The Painting Process:
- The colours I’m using on this Mcqueen portrait are clockwise from bottom left:
- Titanium white
- Buff Titanium
- Pale umber
- Middle grey
- Graphite grey
- Paynes grey
- Lamp Black
- I try to use the black as sparingly as possible as it tends to “kill” or flatten a painting if overused.
- Using darker shades of Raw Umber I now paint in shadows and darker blocks of colour to give my drawing shape and form.
- When working in colour (not monocrome) I use a lot of Dioxazine Purple for the darker shadows.
- Laying in background colours and work on his legs and foreground.
- Progress on the painting is quite slow as I paint in more detail in his race jacket & jeans.
- The most interesting part of the painting, his face, I’ll leave for later as a reward when I have finished the boring bits.
- The portrait is now nearing completion. Enjoyed painting his face, the many lines and wrinkles, each with a story of it’s own to tell!
- There’s more work yet to be done on his hands, adding more subtle shades and contours.
The Finish:
- Here’s the canvas on the easel. I’m not 100% certain yet on the background.
- The original photo’s background was too busy, people’s legs and cars in background.
- I may add a suggestion of the forest’s behind, but I will leave the canvas on one side whilst I work on another one.
- When I re-visit it in a couple of weeks time, I will look at it with a fresh vision then.
I hope you have enjoyed this article. Rob
Rob Kinsey started racing motocross in 1974, culminating in competing in the British motocross championship. He still rides regularly today. His intimate knowledge of the sport and excellent artistic skills meant he won the accolade of worldwide Artist of the Year in the prestigious RacerX Magazine’s annual awards in 2006. Please contact Rob with any questions or comments. robakinsey@hotmail.com http://www.robkinsey.com
____________________________________________________________________________________________
Thanks for your unique article, Rob. Interestingly enough, I grew up in Southern California with many of the motorcross racers you now paint – I admire that sport and love to see you glorify it in paint. It looks like you’ve won the ‘Holeshot’ in motorcross art! Lori 🙂


Hi Lori,
Thanks for publishing this article I posted on my website.
My e-mail is robakinsey@hotmail.com
Many thanks,
Rob