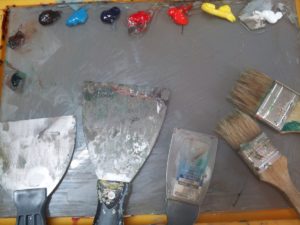
 Lately, I have abandoned my expensive oil paintbrushes for painting with a putty knife and other inexpensive painting tools.
This all started last month when I began taking some ‘abstract’ painting classes with fellow artist, David deVillier. My goal has been to add to my own artistic repertoire in order to more texture to my paintings – and the putty knife sure does the trick!
Last week, I posted an image of my recent ‘putty knife’ painting on my Fine Art Tips Facebook Fan Page and received quite a few questions and comments, so I thought I would share the process here with you.
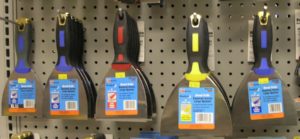
A ‘putty knife’ is a utility knife, sometimes called a drywall scraper, or spatula. Fine artists can use these knives as giant palette knives to create wonderful texture, depth and interest to their oil or acrylic paintings. I really enjoy the freedom these knives allow me.
I have also been using really inexpensive household paintbrushes made out of hog-hair bristle. These all cost somewhere between .99¢ and $3.00 US dollars. With a brush in my left hand and a putty knife in my right, I can easily push and pull the paint around the canvas!
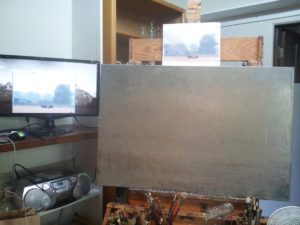
1. This painting first started out as an abstract oceanscape and evolved into a pastoral landscape painting!
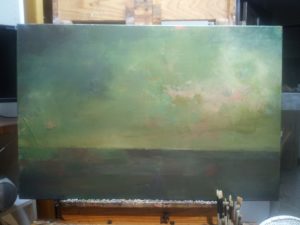
2. After two days of work I was still unhappy with the oceanscape, so one late night I hastily covered it up at the end of a painting session. I decided to use this ‘new’ canvas as an under-painting for a landscape painting. You can see the image is on my computer monitor to my left as well as a printed version above.
(I took this reference photo last year while on my way to Yellowstone National Park and I been looking forward to painting this scene. The new underpainting was just perfect for the palette of this subject.)
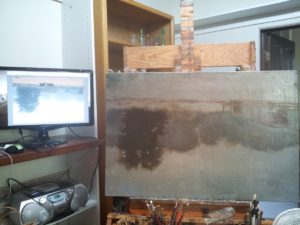
3. After blocking in the shapes with the putty knife and utility paintbrushes, I flipped the canvas upside down to help me to better see the shapes.
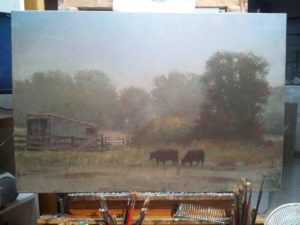
4. At this point, I blocked in the cows and and refined the highlights and shadows…
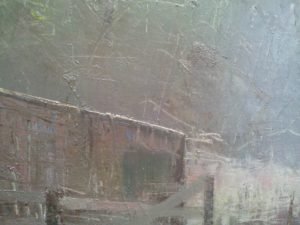
(Barn detail)
(Bush highlights)
5. Finally, I pulled out a few good brushes to finish up the important details. I also decided the painting was stronger with just one cow! Below is the finished painting entitled, “Vanishing Idaho” (not ‘vanishing cow’…lol).
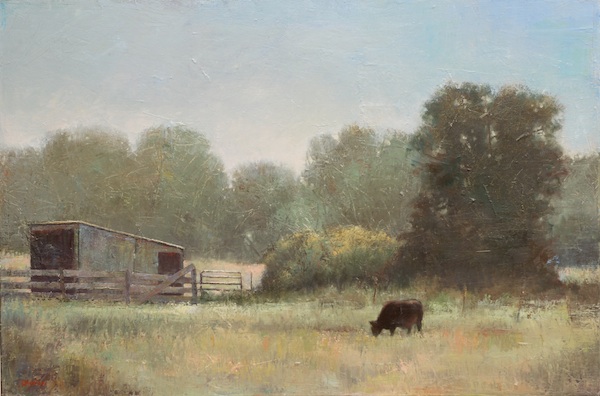
To view more of my paintings, please visit https://LoriMcNee.com or join me on Twitter and Facebook
Here are a few other articles you might enjoy:
If Things aren’t Going Right, Try the Left!
Why Paint Abstract Art?
Creating an Earth-Friendly & Healthy Art Studio
Artistic Temperament: What to Do When it Strikes!
Top Paint Brush Tips from the Art Pros on Facebook
How to Choose the Right Paint Brush for the Art Technique
Water Soluble Oils: Facts, Tips & Why I Use Them
A Study in Complimentary Colors using Yin Yang
Palette Tips: How to Organize Your Paints



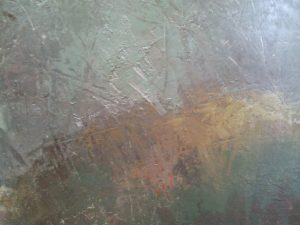
Thanks Lori! That little close up showing the texture and depth in the paint layer is beautiful… as is the painting itself. I mentioned to you that I am also playing around with cheap brushes and knives so this is perfect timing as far as I’m concerned! Are you using any medium to help with flow or drying? I found a medium that helps to loosen up but begin the drying process is an advantage. I’m curious what you think. Thanks again… Marc
Hi Marc,
It is fun to see you on my blog. Thanks again for the complimentary words about this painting process. As you know, this is really thick paint for me! I am used to glazing, so the drying time does take longer. However, I have been using a medium by Grumbacher called, ‘Quick Dry Medium’ and Winsor and Newton makes their own version as well. This add a luster to the paints and speeds up drying. It is originally made for water soluble paints, but it really works. Let me know what you think. Don’t let the water soluble thing spook you…I know what a purist you are!
Best –
Lori 🙂
Nice! I often use plastic cutlery and walmart brushes shaped with scissors to experiment and create effects. I really like the texture you’ve added with your putty knives. Keep up the good works!
Hi Jonathan,
Thanks for sharing the added tips here and I appreciate your words of encouragement too!
Happy painting!
Lori
Monet Lives!
Hello Walter, you are too kind! Thank you for stopping by for a quick comment. It is good seeing you here.
Best-
Lori
I have used this method for years, using the cake knife shape version or largeputty knife version a lot for underpainting. I teach the method one on one to those who desire to expand their reach. the paint is richer and much more luminous, and you can control the advantages with brush when needed in areas and flowing close value areas when needed like in skies. I use liquin as a choice in some areas or Galkyd gel for the fast drying to create depth to this method. It is good to mix it up in parts or for spot use. Nice post!
Hi Karen,
Thanks so much for adding the great tips and information. I am only on knife painting #4 and I am hooked! You have articulated the benefits to this technique in a simple way. I will have to try the cake-knife version next.
Happy painting-
Lori
Beautiful painting Lori- thanks for sharing the info so well….I’m a knife painter and am always interested at the varied effects that others can get with a great variety of knife (& brush!).
Thanks Roxanne, I obviously am loving knife painting too! Thanks for the words of encouragement. I will have to peek at your work!
Happy painting-
Lori
Hello Roxanne, thank you for the encouraging words! I just looked at your website and was very impressed with your beautiful paintings!!! Thank you for stopping by for a visit and comment…it especially means a lot coming from such a wonderful painter such as yourself. I am glad you enjoyed this post.
Happy painting-
Lori
I can’t believe how refined your painting looks, even using a putty knife. You can tell you have such great technique. I love the idea of using larger cheaper brushes and the pallet knife lending to the big shapes, that lend to a better composition. Shapes and value are so important to a strong composition. Very nice.
Hello Janet, how great to see you on my blog! Thank you for the nice words about my art. Yes, all those years of realistic painting have made a solid foundation for me to loosening up in a believable way.
I really am grateful for the comment. Happy painting to you!
Lori
Water doesn’t scare me!!! 😉 Are you still using the water soluble oils here? I’m using Winsor&Newton’s “Drying Linseed Oil” and love it! I like how it sets up the paint but the paint remains malleable for quite awhile, unlike my experience with Galkyd and Liquin, which seem to get too sticky or tacky for working with in the way I am. The only problem with the WN Drying linseed oil is that it shouldn’t be used on lighter value mixtures. For that they recommend their ‘Drying Poppyseed Oil’… but you can’t find it for sale stateside, in England and Europe but not here. 🙁 Still, the linseed oil version is a dream medium for me to use for now. And I agree, that depth of color and gloss that it imbues as you work is a joy.
Thanks again for the post. I like Jonathan’s idea of shaping the cheap brushes.
Haha Marc! Yes, I am using water soluble oils with this new technique. I am glad you found a drying medium that is helping you…I have used poppyseed oil, but have not seen the ‘drying linseed oil’ and will have to give it a whirl – and thanks for the added tip. I have never been a big Liquin fan because of its toxicity, and I agree with you about Galkyd.
Thanks for the follow up comment!
Cheers-
Lori 🙂
Hi Lori, I know I am joining in a bit late, but I wanted to chime in that I prefer knives over brushes myself. I love my water mixable oils and just ran across a new brand. Do you know about Cobra? They are more like oils, I believe, and they offer some different mediums that you might want to check out. I have found the brand online at Dick Blick’s and Jerry’s Artarama. They do cost a bit more.
Great to see your process.
Hello Carol,
I thought I answered your comment a while ago, but it is popping up as new…sorry if I repeat myself. Anyway, I have not heard of Cobra and will check it out. Thanks for the tip. I am loving the putty knife and feel like it has taken my art to the next level!
Cheers-
Lori
Thanks for inviting us into your studio. I’m fascinated by the process that produces such wonderful results. I love the feeling of experimentation you use!
Hello Quinn, thanks for taking time to read and comment. I am glad you enjoyed this post. Putty knife painting is a lot of fun!
Lori