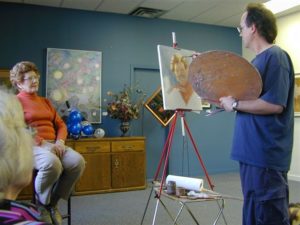
 So, you have learned how to paint human proportions from my earlier article, Painting Portraits 101: Part 1 – Painting Proportions.
But now, achieving the likeness of a human being with paint is no easy task. A well-executed portrait is expected to show a flattering representation of the sitter and should capture inner essence of the subject, not just a literal likeness.
Getting Started:
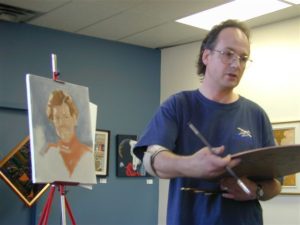
When I am painting a head study from life, I’ll generally start drawing directly with a brush. If I am painting the full body of a figure, or a group I’ll make a loose proportional positioning outline with charcoal, then redraw more carefully with a brush. This gives me a chance to correct errors in the initial scribble. Once I have the proportions worked out, I am read to block in the masses.
I block in the big masses of light and dark, using the general local colour of that part of the picture. At this early stage, I want to get the volumes and sense of light established. I am still drawing at this point, in fact throughout the painting, I never stop drawing. But as the painting progresses I am making large accurate shapes instead of lines.
Every mark that is made in a picture is a drawing mark. These marks all describe something. Sometimes these marks might be a broad stroke describing the plane of a cheek, sometimes they might be smaller marks fixing the exact shape of an eye, but they are all a form of drawing, even if your paintbrush is an inch and a half wide! If a mark is not describing something, except in a large, loose background, it’s probably a wasted mark.
Tips for Getting Started:
- Establish your darks early.
- This will help you see the mid tones and create the lights.
- A likeness is in the big shapes of the head and the light and dark masses.
- Massing in the large shapes accurately lets you correct linear proportional mistakes and allows for checking and rechecking your general drawing.
- Be prepared to let go of an inaccurate line if filling in the big shape shows you got it wrong.
- The structure carries the likeness.
- Get these foundational shapes right and the details you paint into them will capture expression.
- If in doubt check your painting and subject side by side in a mirror.
- This trick will often reveal errors you knew were there but could not identify.
- An accurate eye in the wrong shaped socket may be your subjects’ eye, alright, but the painting won’t look like her.
- Worry about those tiny details that make the expression and character of your subject really live when you have got the big stuff right.
- A well painted accurate shadow created by the eye socket and eye mass will let you ‘see’ the eye before you even paint it.
- That’s how we can recognize people from a distance, before we can really distinguish features in detail.
Tone:
- Tone describess how light or dark a colour is.
- If the painting is going to be successful, you must get the tones right.
- In describing any form in particular light conditions tone is critical.
- The face is ‘skin’ coloured but what tone is that colour in the deepest dark?
- You’ll be amazed how dark those darks can be.
- Ask yourself; is there really any white there?
- Is anyone truly the color sold as flesh in a tube? Not really.
- There are many variations of colours in any one’s skin tone not to mention the many colours we are as people.
- Get the tone of a colour right and it will make the form you want to depict. It will stay where you put it and add to the solidity and realism of the picture.
- Get the tone wrong, and it will jar the eye.
- A blazing highlight in a shadowy eye will jump out of its socket.
- Remember that all colours in your subject are affected by the same light.
- For example: If one side of a blonde head is in deep shadow, like the subjects suit, the hair is going to be very dark blonde. If you paint those bright tones from the lit side of the head in the shadows it will be just plain wrong. This may sound obvious, but people do it all the time. Your brain ‘knows’ that a dark blue suit is very dark in the shadow areas, but it also might tell you it ‘knows’ that skin is still the same value in the darks. But, it is not and your eye sees the difference.
- Trust your eye!
- Sometimes skin can all but disappear into a background shadow. Look at a Rembrandt or a Caravaggio! Or even a strongly lit photo in a magazine.
Trick: Isolate a dark on the face by surrounding it with a white card and you’ll be amazed at the colour and value you are looking at.
Colour:
- Colours have tones (how light and dark) and temperature (how intense).
- Warm colours tend to advance.
- Cool colors tend to recede.
- Remember that all colours in your subject are affected by the same light
- Warms tend to advance, while cools recede.
- In a face, the centre third portion of the face, the nose and cheeks, tend to be warmer than the rest of the face.
- But, too red a cheek will not stay on the face; it will float and worry a viewer!
- As the face recedes towards the ears, the forehead and neck are often cooler.
- This helps your nose stand out from the face. It’s subtle, but it’s there.
- The interplay between warm and cool not only creates believable form and space but is a pleasure to look at – a painting that is all cold or all blazingly hot tends not to work so well.
- Cool light generally creates warm shadows and warm light cool ones.
- North daylight is cool, spotlights are usually hot.
Knowing this rule helps you see it when you look.
Features and Details:
- Remember the whites of eyes are rarely white.
- The eye is in a socket and the eyeball is within lids and beneath eyelashes, so they are always in some sort of shadow, no matter how slight.
- Really look at your subject and you will often see that the light tones on the lit areas of a cheek are lighter in value than the whites of the eye.
- Paint the highlights with pure white (as beginners often do) and they jump clean out of the socket and look like poached eggs in a pan!
- In most light situations the top lip is darker and cooler than the bottom one.
- Mouths without strong makeup are soft edged shapes.
- Lips are skin with more nerves and blood in them, so they only have really crisp edges when people’s lips are unusually dark or wearing lipstick.
- The shape of the shadow under the bottom lip is a critical shape to get right. Observe how dark it can be in a person with a full bottom lip.
- Nostrils are in a nose, not under it- the flutes of the nostrils surround the nostril itself.
- Where hair line meets skin is not a hard line. Paint a little skin up into the hair and a little hair back into the skin.
- Use the wet into wet approach and you’ll get a convincing look of hair growing out of the skin, not sitting on top of it, like a hat.
Edges:
- Your eye will go straight to the crispest edge in a painting creating a focal point.
- This is most often a point of high contrast where a light and dark meet.
- Make sure that edge is where you want it, up around the head. For example, the dark of hair against the edge of a lit cheek creates a focal point.
- Soften or lose some edges by having your background and parts of your subject very close in tonal value.
- Doing this not only focuses the eye back to the head but also helps your figure sit in its background and become a part of it, instead of being a cut out, floating against it.
- The same is true when painting anything…if a rock is your focal point in a landscape; make sure your crispest edge is there.
- The artist can lead a viewer around a picture by the use of different types of edge.
- If it’s all soft or all crisp there is no focal point and no one knows what they are supposed to be looking at!
Backgrounds:
- How much detail should be in a background?
- If you are using a setting to tell part of your subject’s story, background objects or views can help.
- Remember, the background should stay back.
- The subject is your sitter, the other stuff while it may have emotional or historic significance is secondary.
- Too much in the background can be overwhelming.
- Control of edges here really helps.
- If your sharpest edge in the whole painting is that lovely vase behind Aunty Flo, Aunty Flo may get overlooked at first viewing.
- Simple colour and shadow shapes can work well. This makes the subject the sole rendered object and focal point in the painting.
Palette:
Anders Zorn used around five colours, so did Velasquez. Rembrandt maybe used six colours on his palette, largely earth colours. Nelson Shanks sometimes has 27 on his palette. Whatever works for you, use it.
My own palette is:
Titanium White, Naples Yellow, Cadmium Yellow Light, Yellow Ochre, Terra Rosa, Cadmium Red Light, Permanent Rose, Burnt Sienna, Cerulean Blue, Ultramarine, Viridian Green, Raw Umber and Lamp Black.
I also occasionally use Alizarin, Cobalt Blue and Forest Green.
Brushes:
I like Synthetic brushes and believe it’s worth buying great brushes. A good brush makes life so much easier. Bad brushes drive you nuts!
Lighting:
- Obviously you’d like your light to remain fairly consistent, especially when working from life. North daylight is great, but we don’t all have it all the time.
- Lamps can work well.
- If you are working from photographs and many modern portraits have to be done this way.
- You can control and ‘fix’ the lighting. Remember that strong single light sources create drama and can really toughen up a man in a flattering way.
- A woman or child may demand something softer.
- Harsh light accentuates lines- people rarely like this! Women especially.
- The truly ancient are sometimes proud of them, the middle aged less so.

- Most people want to look their best and it’s your job is to help them – but never lie.
- If you’re after gritty social realism this does not matter good light helps.
- Outdoors, the direct sun is a very harsh light indeed.
- Wait until evening, or find some shade, or have the sun back light your subject.
- It creates a lovely halo effect.
- Remember to compensate with your camera settings for the sun or you’ll wind up with a silhouette.
- If you are using a strong side light for a photo reference shoot, remember your camera will not record what your eye can see in the darks. Used a reflector or less powerful deflected light to bounce some reflected light back into your subject. This helps and gives you a shot closer to what you saw.
When is it finished ?
A painting is complete when you have said all you wanted to say about the subject. This might happen early, with much of the surface still loose and comparatively understated. For example, this might happen in a head and shoulders vignette.
Or it might be after a great deal of work if you are after the photo realism of Nelson Shanks. Sometimes you will want to take some paintings further than other or sometimes the suggestion of something is more effective than painstakingly reproducing it. Some of my own favorites have a slightly sketchy feel, caught in the moment. They are fresh and say what I wanted to capture. Others are real labours of love and need all that is in them to complete the story.
A commissioned portrait is finished when the client is completely happy and not before. If you are going to do this for a living rather than for your own pleasure, you must accept this. A commission is a contract and you undertake to fulfill it.
Final thought:
Work from life as much as you can- you won’t always be able to, but the hours spent doing so will pay off when you work from photo’s and give these pictures an authenticity that slavishly copying a photo may lack. You can be selective – a camera cannot.
Sounds like a lot to think about, but as these tips will work in painting any representational subject they are worth internalizing.
Happy painting!
by guest artist/authorDavid Goatley http://www.davidgoatley.com/


Excellent and thorough article on portrait painting! I’ve been to many seminars and read many books, but learned a lot from this article. Great insights and observations.
Thanks for the great comment, Todd! I will let David know that you found his tips helpful. I took a class for him years ago and found him to be a great teacher. Best of luck painting! Lori
Again, thank you for your clear real understandable techniques. So often teaching tools are nothing more than simple hints that really are driven to have you by their book. Your teaching is clear, precise and beneficial. Something that I can use immediately …
Hello Becky,
David is a great teacher and I was lucky to have him teach us all here on this blog.
Happy painting,
Lori
On my way to a painting class. I am starting a small portrait of myself with my clown makeup on. As a landscape painter, this is a diversion. Thank you for your tips. Especially those about hard and soft lines.
Want me to send you a picture of what I will do?
Hello Adrienne, many thanks for your comment and my sincere apologies for the belated reply!! I appreciate your comment…
Thanks so much for the insight. I have been drawing and digital painting cartoons of years now…and my grand daughter turns 3 next month and I don’t really want to do a cartoon of her. With my limited a out of oil painting (plein air) I think I can do this 🙂 Wish me luck.
Randy many apologies for the belated reply!!! I hope you have succeeded with your painting adventures. Thank you for your comment and patience!
I Have following your beautiful works of art And have kept each and and everyone of e-mails
I refer back to them often I have been painting many years
I have gone to university Taught drawing oils and other media
Thank you for your great suggestions Senior 74 years
You never stop learning from people like you My favorite is portraiture Thanks kindly Vivian Mclean
Edmonton Alberta Canada