First of all…what is Masonite?
Masonite is brand of hardboard that was invented in 1924 and was originally used for many construction applications. It is formed using the Mason method of compressing and blasting wooden chips with steam and then forming them into boards. No glue of other material is added. Only natural ingredients are used which makes it an environmentally friendly product.
Although I still call it Masonite, I have been told by the lumber yards that the Masonite brand is no longer manufactured. It is now referred to as Hardboard for High Density Fiberboard. MDF for Medium Density Fiberboard is also available but is undesirable because it is held together with formaldehyde which makes it non-archival and doesn’t take the paint very well. (Please see Jim Parker’s comment below for more updated information).
Both come in 4’x6’ sheets of ¼ or 1/8 inch thickness that I cut down to the desired size. When ordering from your local lumberyard, be sure and speak to someone who is knowledgeable on this subject.
Tempered Masonite:
-
It is more durable, but not as desirable for a painting support.
-
It is impregnated with oils to make it water and wear resistant. (I hear they might be making ‘tempered’ without the oil nowadays, but I don’t want to risk it…)
-
Acrylic gesso will not bond correctly because of the oils and may not survive the ages.
-
It might yellow the painting with age.
-
Conservators consider tempered Masonite a poor support.
Untempered Masonite:
-
Widely used by artists and thought safer for archival painting
-
Less durable than tempered, chips a bit easier
-
Will not yellow with age
Prepare the panel/board:
-
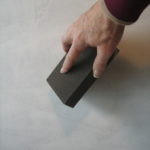
Lightly sand the smooth side of the panel. This allows the gesso to bond to the wood more easily.
-
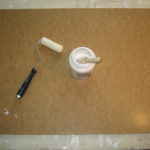
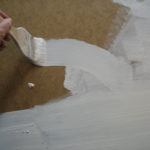
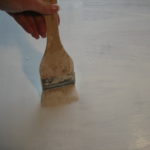
Apply one layer of gesso in horizontal strokes across the panel using a soft brush (I use an Oriental Hake brush)
-
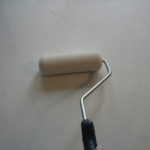
Use a roller if desired (this changes to an even ‘stippled’ texture)
-
Allow to dry
-
Lightly sand (if you want a smooth surface)
-
Apply second layer of gesso in vertical strokes across the panel. This makes a slight ‘weave pattern’ to the gesso and adds some ‘tooth’ to the panel
-
Use a roller if desired
-
Allow to dry
-
Sand (if you want a smooth surface)
Tips:
-
To prevent warping of larger panels – gesso both sides.
-
For extra large boards over 30×40, I suggest ‘cradling’ the back of the board. Cradling makes the panels’ rigid using wood bars that are glued to the back of the panel. My custom framer does this for me.
-
Make sure you use at least 2 coats of gesso because Masonite is highly absorbent and the paints will sink otherwise
-
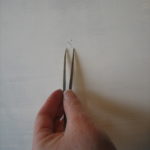
Use a tweezer to pick out any brush hairs, clumps or lint
Preparing a panel with gesso is an easy process and only takes about ½ hour from start to finish. I usually make an assembly line and gesso a series of panels all at once. Sometimes I use a hairdryer to speed up the drying process. Once dry, I can immediately begin to paint on the prepared panel and expect great results! Masonite allows me a smooth surface for fine detail, glazes and texture.
Give it a try!
Lori 🙂
*****
You might like to see these other related posts:
Save Money: Learn How to Gesso a Hardboard Panel for Painting



Thank you so much for this informative post! I’ve been meaning to stop using canvas panels for my daily paintings… Found your blog through Twitter!
If you ever want to hear a reader’s feedback 🙂 , I rate this post for four from five. Detailed info, but I just have to go to that damn yahoo to find the missed bits. Thank you, anyway!
Many thanks for the useful tip!
Great post, Lori! I haven’t painted on masonite in ages.
I don’t think “masonite” is the same thing as MDF though. MDF is actually held together with formaldehyde, which makes it non-archival. Hardboard, on the other hand, is high density fiberboard, processed via steam and pressure — the original Mason process. I’d use hardboard before MDF for archival and painting purposes because of the formaldehyde in MDF. MDF does take paint very well though, but the dust is sort of toxic.
According to one manufacturer (Canfor)
http://www.canfor.com/treeschool/library/files/wood.asp
MDF- Medium Density Fibreboard
This non-structural panel is a combination of wood and adhesives bound together by heat and pressure. Agricultural products, such as the cereal grain bagasse, can be substituted for wood in the process. Being fairly young product, this sector is technology-based. Most of the facilities are quite new and have advanced processing and environmental technologies.
Hardboard ( high density fibreboard)
This product was discovered accidentally when a steam valve failed in a laboratory, causing high, prolonged pressure on a fibre mat, which produced a hard dense panel. Hardboard is often called Masonite, named after the scientist William Mason who was running the experiment and was out having lunch when the incident occurred.
And now, on to the painting!
Some great information and Jim I never knew about the masonite history, but heres one for you , Did you know that the household cleaner Formula 409 is one of the most volatile ones out there? and did you know why it was called Formula 409? Apparently because of the chemical contentes that are in it they really didnt have a clue of how they would react together and each time they came up with a formula it would still be such a powerful combination that it wouls eat the finishses right of the furniture and other substrates. anyway to make a long story short. It took 408 attempts at a formula to get it where it was safe enough to use without burning holes through your sink. Hence the name
“Formula 409” ( needless to say I threw our bottle away)
Thanks for taking time to share your 409 story. Very interesting, in fact, I followed your example, and threw my bottle away as well! 🙂
I’ve started using gessoed Hardboard more in my small color pencil drawings. I am mainly using Erasable Color pencils, but for final top layers, using non-erasable color pencils, then maybe Prismacolor and/or China Marker for final top layer. I like the erasable color pencil since you can layer up an area, erase out highlights and then rework it, over, and over, and over. Normal art paper and illustration board would get torn to pieces in this process due to the erasing. Hardboard with Gesso just takes it and keeps on looking like new.
Up until now, I’ve mainly been using one layer of gesso because color pencils don’t need as much tooth as paint. However, I might start sanding and putting on more layers because I scan the final work to use on various art upload places like Zazzle and Cafepress – The smoothness of the sanding might help, but I doubt it since color pencils normally shine under scanner light as it is wax, so color balance will be off anyways…. Will have to try it and check it out… I had Lowe’s cut a couple of hardboards down for me to 5″x7″ and 5 1/2″ x 7 1/2″ squares. Now I have a bunch of little boards to use for this purpose. I love that size since it’s perfect size to go on greeting cards, or to be framed since it’s the same size as a standard photo… I have found that if I do frame it in photo frames, I need to use a bigger sized frame that’s got a matte to bring the inner piece down to 5×7 because the hardboard is a lot thicker than your average photo, so the frames are not typically wide enough to fit them without having to do some modification to the frame. It’s just easier to use a matte – the big piece of hardboard under the matt will cause the middle of the frame to bulge a little, but if you are careful, you can use this to your advantage since it’s creating a nice tight fit that will keep the hardboard from moving once the frame’s on the wall.
Jeff, I really like what you shared in your comment. Thanks for taking time to write your tips and experiences. That is what this site is all about!
In the near future, I plan to start a new catagory on the site called, “Letters to Lori” where I can share helpful tips by readers such as yourself.
Thanks again and come back again soon!
Lori
I came back to this posting through a book mark. I found an interesting tutorial on making glass smooth gesso canvas yesterday and thought I’d post it here since it’s sort of a related issue. http://www.adcookfineart.com/xtras/articles/creating-the-perfect-ultra-smooth-canvas-for-airbrush/
I created a backlink to it on my Delicious bookmark’s blog, and will create another one for this posting too. http://www.mastermesh.wordpress.com
Jeff, that is an informative article you shared. Thanks, I am sure it will help others. Thanks for taking time to comment and I am glad to meet you here!
Best – Lori
Hi Lori! I would like to paint small paintings on masonite and sell them without frames. I am wondering how to make the painting on masonite look finished and professional. I am referring to the back side and presentation of the whole piece.
Hello Kerry,
You could cradle the boards, and that always looks nice. But, if you are planning on painting on uncradled boards, then you can always paint the backside. Hardboard has a smoother front and back, so it will give a better finished look. Masonite has a rough texture on one side. I hope this helps 🙂
Hi Lori.
I just came across this post and have a question. My class did a project recently using a pumpkin and crayons. We melted them on it with a hairdryer. It was cool and the kids LOVED it. Ok here’s the relevance to your post. I’ve seen similar projects where people use crayons on canvas and melt them for some cool art. Our class would prefer to use Masonite. I’m wondering if following your directions with the gesso foundation would wax crayons adhere to a gessoed masonite board? Just thought you might have some insight into whether that was possible given your experience.
Thanks for any helpful info you may have.
Hello and thank you for stopping by. Wax will not adhere to an acrylic base. So I would suggest using the raw wood, or using a oil based primer. A thick watercolor paper, or matboard would work fine too. I hope this helps you! Have fun and good luck…
Thanks so much for your reply and advice. I will give it a try.
S
Can you screw D-rings or a saw tooth hanger into the back of Masonite? Is the hardboard strong enough to support 5-10 pounds?
Hello Linda, the D-rings will not work on masonite alone. You will have to cradle the back and then screw the D-rings to the cradled section. I hope this helps.
Here’s a little info on the subject of masonite/hardboard. I am, today, having to drive160 mile round trip to pick up 4 large paintings of mine from 2 different galleries. All 4paintings are between 3’x4′ and 4’x 5′ done on cradled hardboard panels which I primed on both sides and all edges. Two were painted last June while the other 2 were finished in Oct. All 4 have, just recently, begun to warp badly. One has twisted so badly that the bottom left-hand corner is 5-6 inches out from the wall while the top corners are touching the wall! The other 3 paintings are not as severely warped, but seem to be getting worse every day for the last 2 weeks.
We are experiencing an extremely cold weather pattern ( below freezing for about 2 weeks) and this seems to be what is causing the warping. I will be attempting to savage the paintings but don’t know exactly how to prevent this from happening again. I do smaller paintings on hardboard too and have not seen any warping but the large ones are really in trouble. Just thought it would be a good idea to give folks a heads up. I will never use hardboard for anything larger than maybe 2’x2′ again.
Hi Brian, I appreciate your comment and the added ‘heads up’. I use hardboard for large pieces, but I make sure the cradled board has cross sections. This really helps with the warping. But, those panels do get heavy! Thanks for the comment. 🙂
I painted Masonite board with gesso but I didn’t read this until after I was done painting. :0 So I I didn’t sand it and the gesso is pealing off what a mess! So I’m going to start over I’m considering just using normal wood. the board is too flimsy and its too slick to hold paint. any suggestions.
Be sure not to use tempered boards. These boards are treated with a chemical that will not adhere and will yellow with age. Use untreated wood. You can lightly sand it first. I hope this helps! 🙂
very good . very thank you
You are welcome!
Great post. In response to the person with warping masonite, wetting the back and laying them flat might just be enough to straighten them again!
Great Sandra! Thanks for letting me know.
Excellent info. Thank you. I am working up a large 32×48 cut of hardboard. Even with large canvas I apply at least 10 even coats of gesso. Allowing each coat to dry thoroughly before cross patterning another layer to ensure evenness. Once dry I sand the finished gesso to a paper-like smoothness with an orbital sander(100grit).
I’m left with an incredibly durable, reworkable, surface that is devoid of a tooth I would try and overcome ordinarily. (Just my preference)
Any draw backs in the aging of my process that you know of?
Thanks for the added gesso tips! It sounds as though you are doing a great job. I would only add to make sure you are using untempered/treated hardboard for archival purposes. Good luck!
Great write up but one question. How does the wood glue bond between the CRADLE BOARDS and the ROUGH side of the HARDBOARD? Is there special prep or do you need to use the HARDBOARD with 2 smooth sides and just roughen one up for gluing the cradle boards on the back?
Thanks
Hi Carl, I have had good luck gluing the rough side with a strong wood glue and clamps. If you glue to smooth sides, use clamps too. However, I generally buy my cradled boards nowadays. I’d rather paint than make them! I hope this helps.