In this article I’m sharing a simple photography hack and a few tips for taking self portraits – and I don’t mean a selfie.
This is a way to create a decent portrait of yourself and as long as you have access to a digital camera, it’s free!

Here’s the reality, professional artists need at least one quality headshot for promotional purposes. However, hiring a good photographer can be expensive and time consuming.
As a brand ambassador, I was asked by Royal Talens to provide them with a headshot for an upcoming Cobra solvent-free oil paint ad ASAP! But, my current headshots were older and outdated and I wanted a fresh look. So I decided to take my own photos.
But first things first…
Building Your Brand
Before I took any photographs, I gave some consideration to my personal brand. I set the stage complete with costume, hair, makeup, and flattering lighting!
It helped to remember this:
Branding is who you are or what the world thinks you are. Every time a prospect or a potential customer makes contact with you in person, print, virally or by other means, they are formulating an opinion of you as a brand, this is branding.
What is your brand identity?
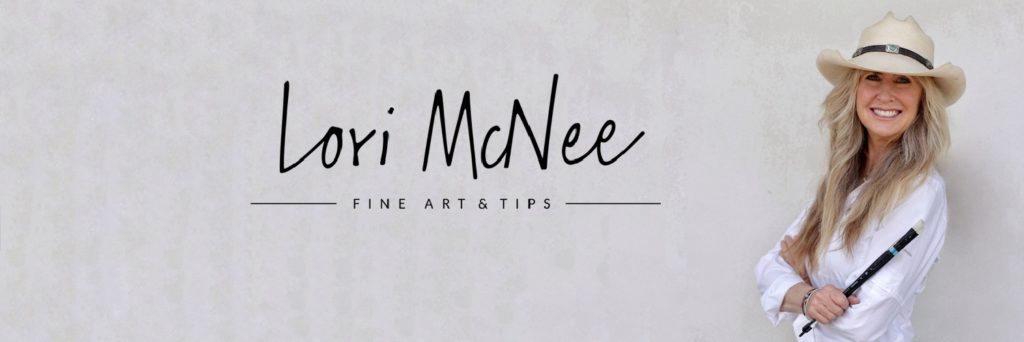
I am a painter. My own personal brand is about plein air painting, nature, living out West, and adventure. A blue denim shirt, a cowboy hat and a few paintbrushes were enough to help me tell my brand story.
Next, I chose a few simple backdrops, all in the shade with nice reflective light. My front porch with barn wood, my gray garage doors, and an off white stucco wall all served as nice portrait backgrounds.
Think about your own brand and how you want the world to view you!
Choosing the Right Lens
Most portrait photographers prefer lenses with lower f-stops — between f/1.8 and f/2.8. Lenses with lower f-stops allow more light into the lens and will blur the background of the shot. This makes the subject stand out and gives your portraits that “professional” look.
The most popular portrait lenses are:
- 85mm
- 50mm
- 35mm
I chose to use my good ole’ Nifty 50mm lens!
A Few Camera Settings
Luckily, I have some good camera equipment for taking landscape, wildlife and reference photos. I decided to use with my Canon M6 Mark ii which is an APS-C format mirrorless camera with 32 megapixels.
Auto modes on your camera are a great place to start, but Manual mode is going to give you much more control over the look of your photos. So, I did a little research on portrait tips. I found few helpful articles, 10 Camera Settings and Equipment Tips for Portrait Photography and What’s the Best Lens For Portrait Photography.
- ISO – 100-400 or use higher if a faster shutter speed is needed.
- Focus mode – autofocus, set it to a single point and use back button focus (not zone or multiple points).
- Drive mode – single shot.
- Aperture – between f/2 and f/4
- Shutter speed – between 1/200th handheld, or 1/15th on a tripod.
- White balance – auto.
- Timer – 10 seconds.
Now, I was ready to take the photographs…
The Portrait Photography Hack
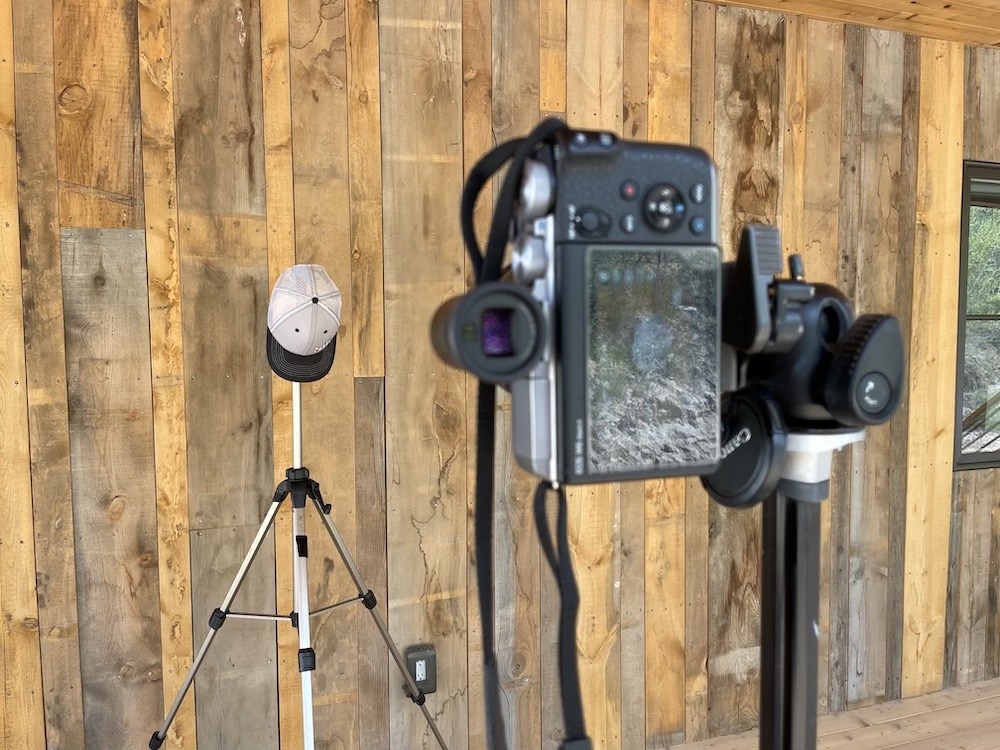
I set up two tripods, yes two (see image above). One for my camera, the other for a baseball cap!
Here’s the hack – the baseball cap is a stand-in model!
Remember to set your camera to a single focus mode. One-Shot AF (Canon)/AF-S (Nikon), Single autofocus mode (AF single) is the most basic option available. By selecting the single autofocus, your camera will lock the focus on the subject that you want to photograph. I set the focus to zero-in on the top button on my baseball cap.
Be eye-to-eye with the subject!
Use the Timer & Single Focus Point
Set your camera self-timer to 10 seconds or use a remote shutter release.
On the Canon M6 Mark ii, I just tapped the screen and that gave me a 10 second countdown to get in position! Tapping on the screen also focuses and locks the lens on the single point – the button.
Then, I quickly moved into the place where the second trip-pod was. I did my best to place either my nose or eye in the same spot where the ball-cap button was. Does that make sense?
Get Creative & Snap Away!
Be sure and take a lot of photos! Try different positions, backdrops, clothing and hats. I changed my top a few times and moved around to different locations with interesting backdrops.
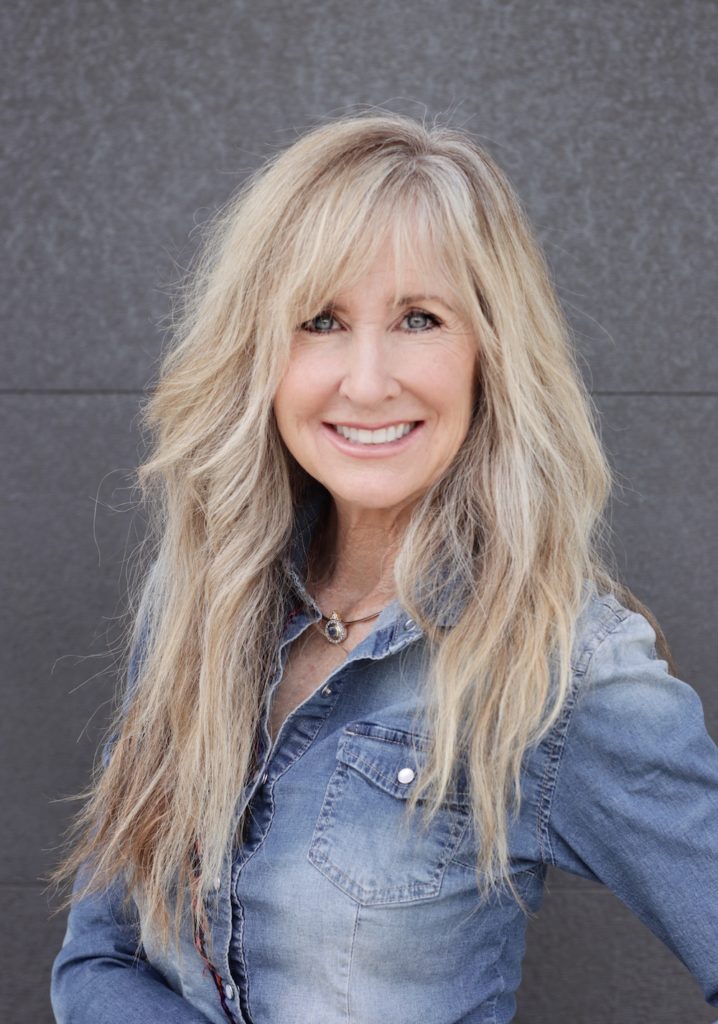
I took at least 50 different photos and ended up with only a few favorites. I’m not very good at Photoshop, but Snapseed came in handy to fine tune the images.
For the most part, I’m please with the results! I’ve already used one for my new social media headers and the other for my avatar.
Next time maybe you will try my money saving photography hack for taking self portraits.


Thanks so much for sharing this Lori, I really appreciate you taking the time to explain your process! I will give it a try.